Partner Tiers
Create levels within your partner program so you can recognize partners differently based on their engagement or success.
Overview
Partner Tiers let you build a structure like Registered → Silver → Gold → Platinum. Each partner belongs to one tier at a time, and their assigned tier is visible to both you and the partner. You can set a partner’s tier by hand, or let partners earn and keep tiers through journeys; see Earn Tiers Through Journeys.
Create a Tier
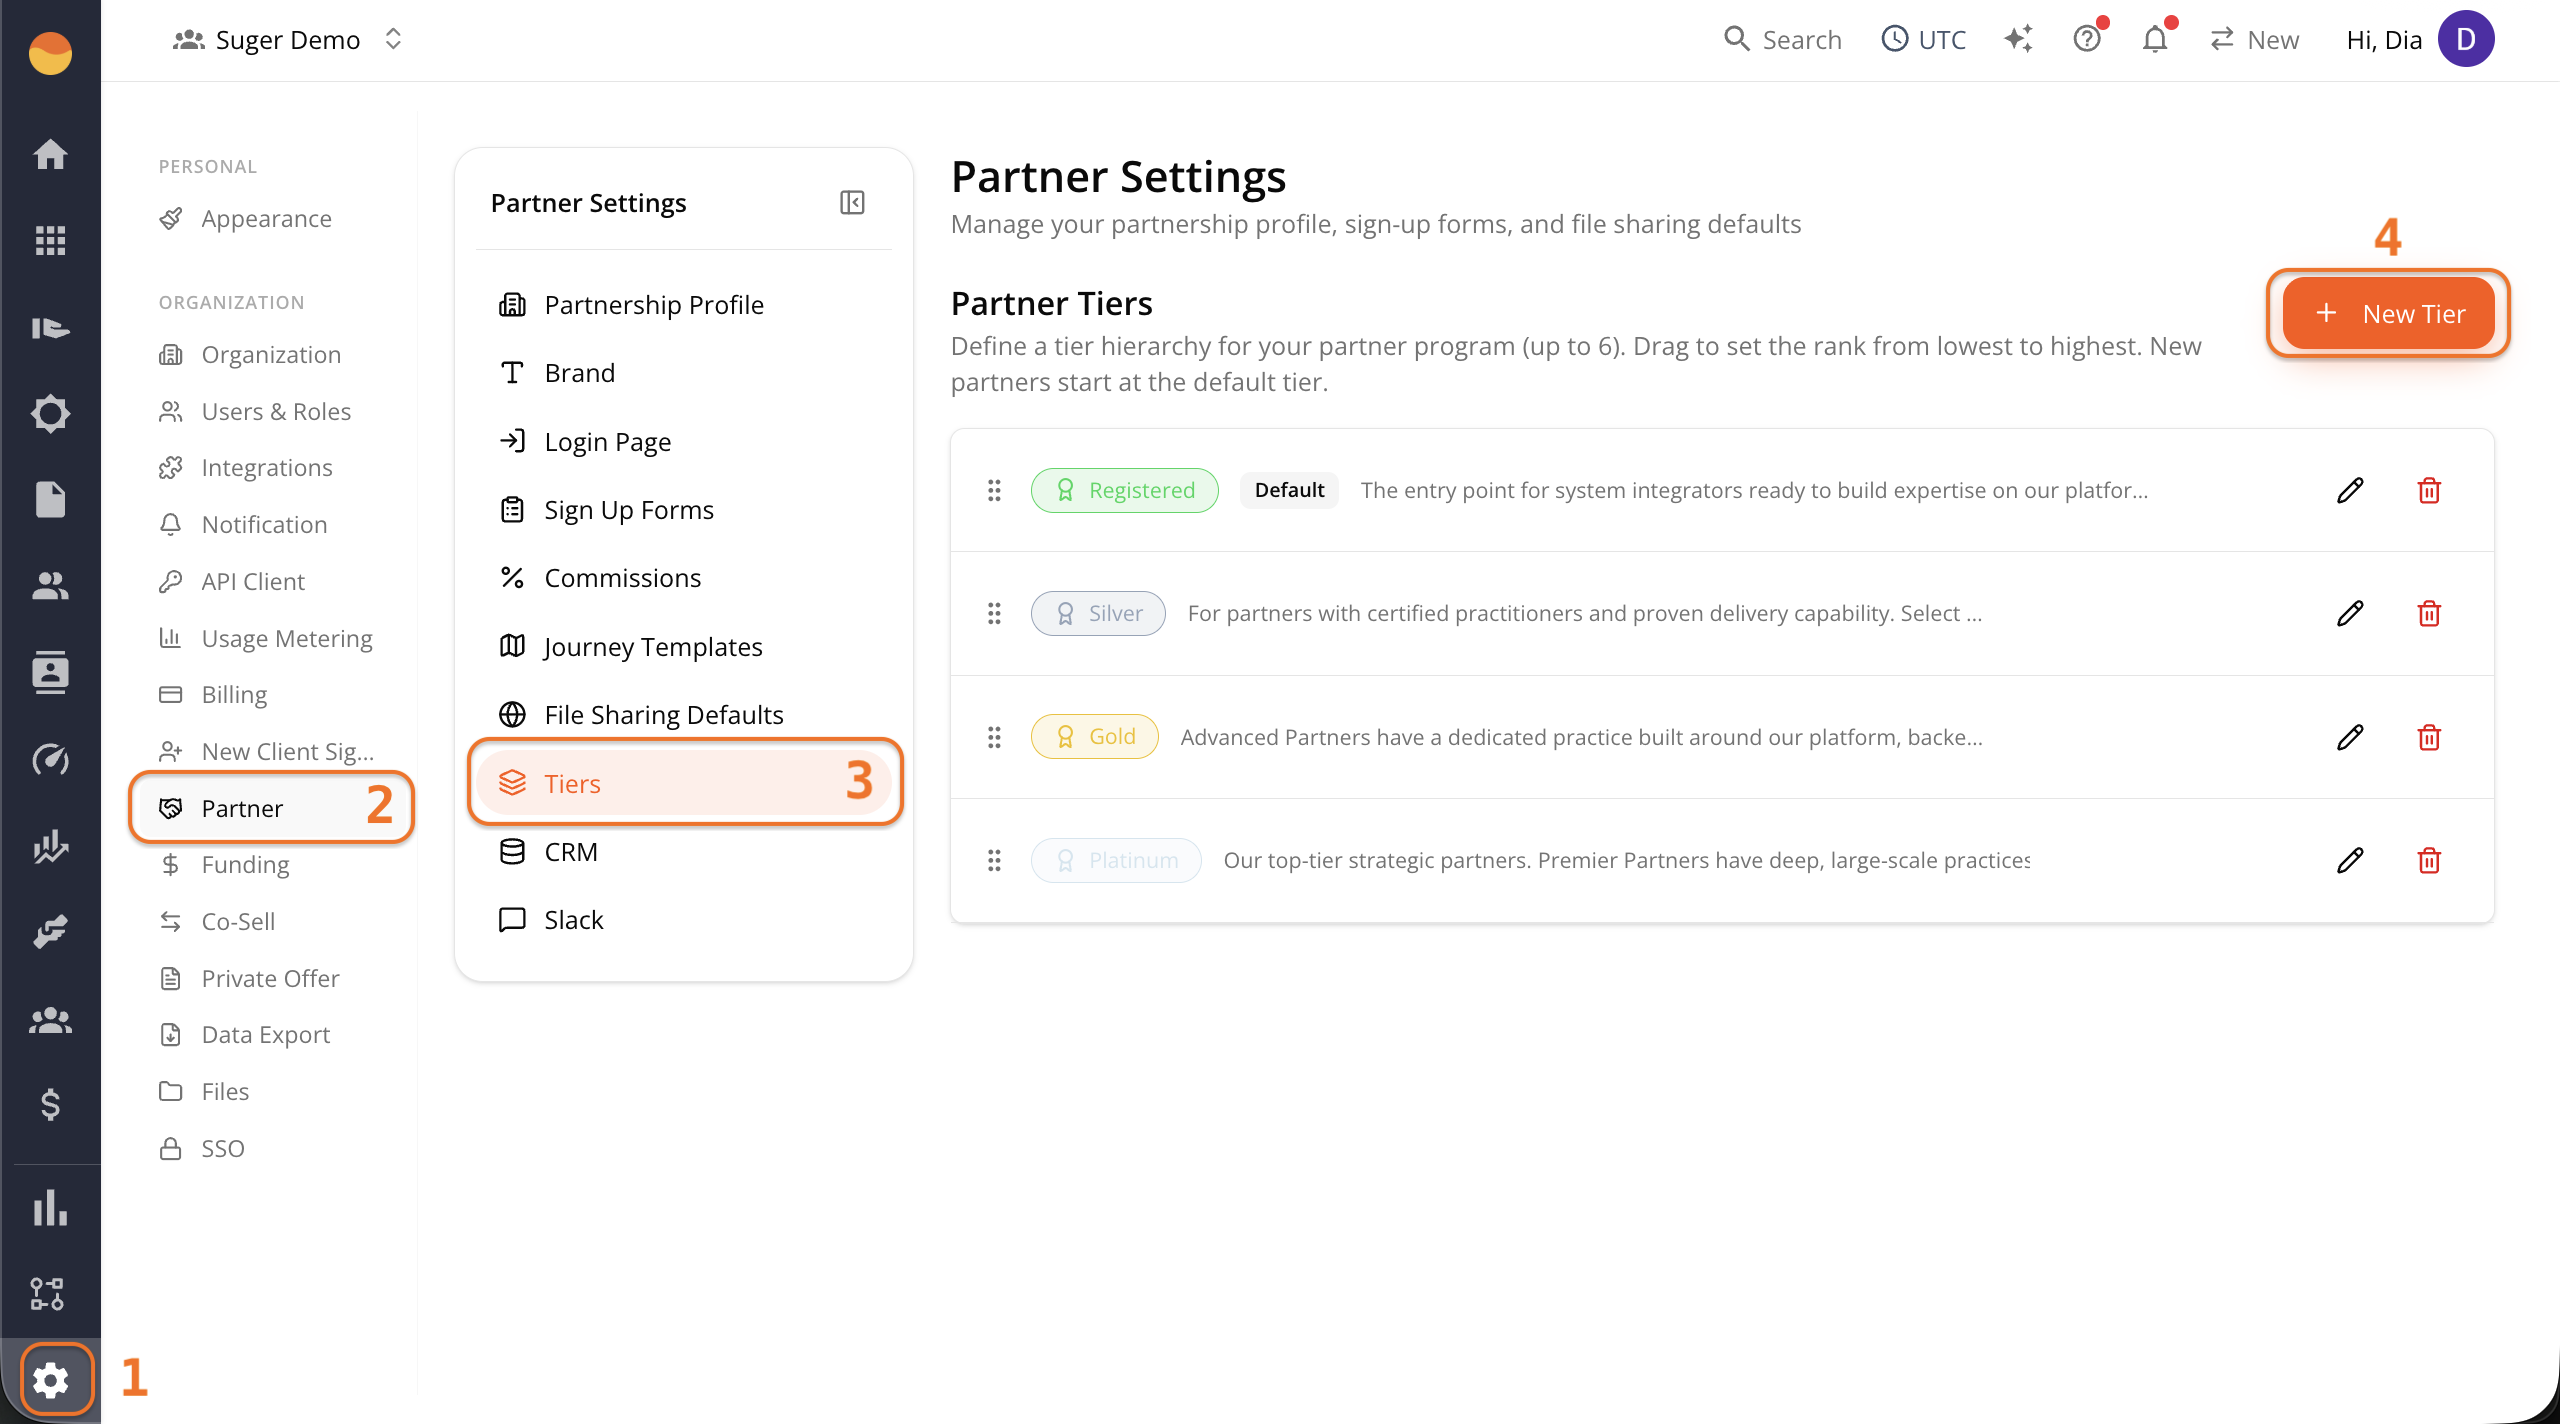
- Go to Fours Console, then Partners.
- Click Settings at the bottom of the rail, then Tiers.
- Click + New Tier.
-
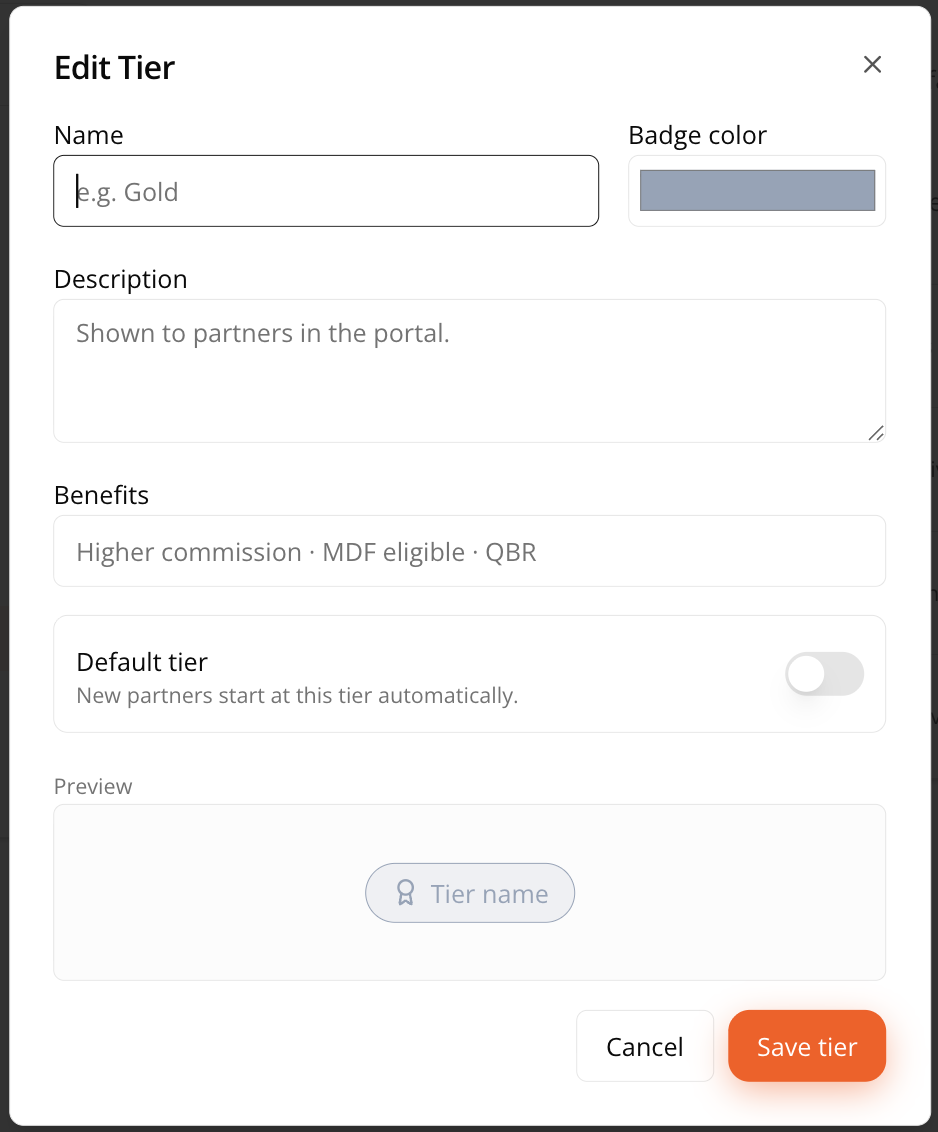
Fill in the tier details:
- Name — What the tier is called, for example “Gold.” This shows to partners.
- Badge color — The color used for this tier’s badge wherever it appears, including on the partner’s own view of their status.
- Description — Shown directly to partners in their portal. Use this to explain what the tier represents and what it took to get there, for example: “Advanced Partners have a dedicated practice built around our platform, backed by a track record of successful customer outcomes.”
- Benefits — A list of what the tier actually unlocks, for example “Higher commission · MDF eligible · QBR.” This is also partner-facing, so write it as something a partner would want to read, not just an internal note.
- Default tier — Toggle this on for the one tier new partners should automatically start at. Only one tier can be marked default at a time.
-
Click Save tier when you’re done.
Reorder Tiers
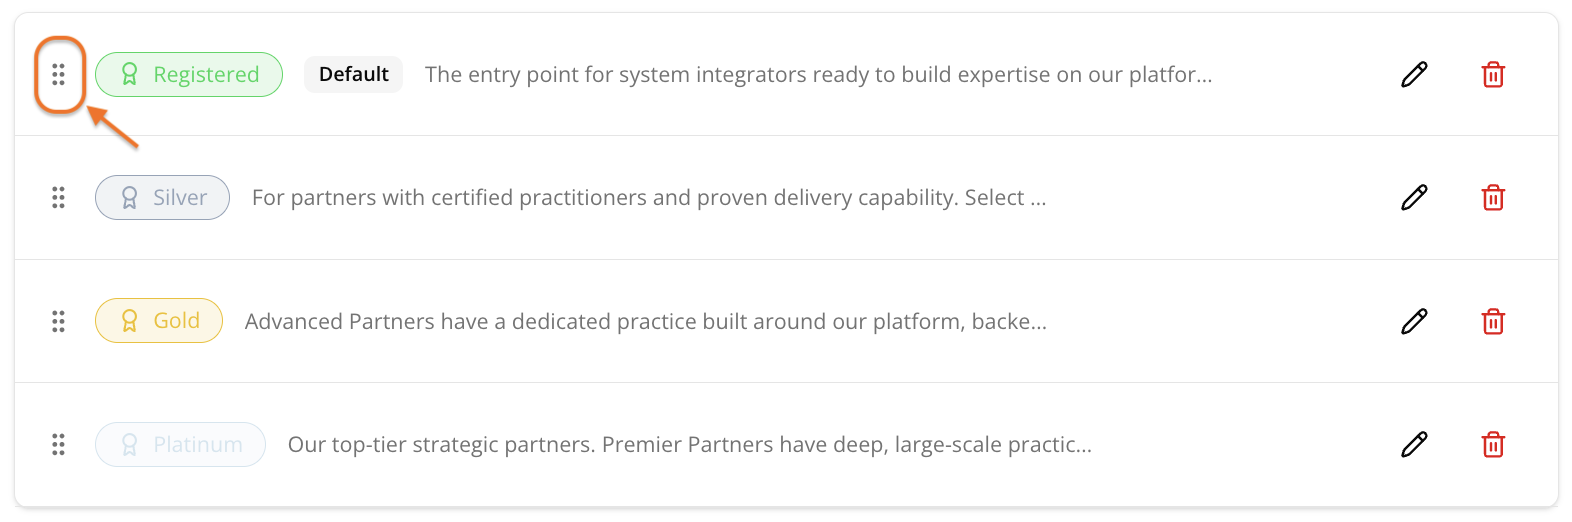
Back on the main Tiers page, drag tiers using the grip handle on the left to set their rank from lowest to highest. This ranking is what determines which tier is “above” or “below” another, for example whether Gold outranks Silver.
You can create up to 6 tiers total.
Edit or Delete a Tier
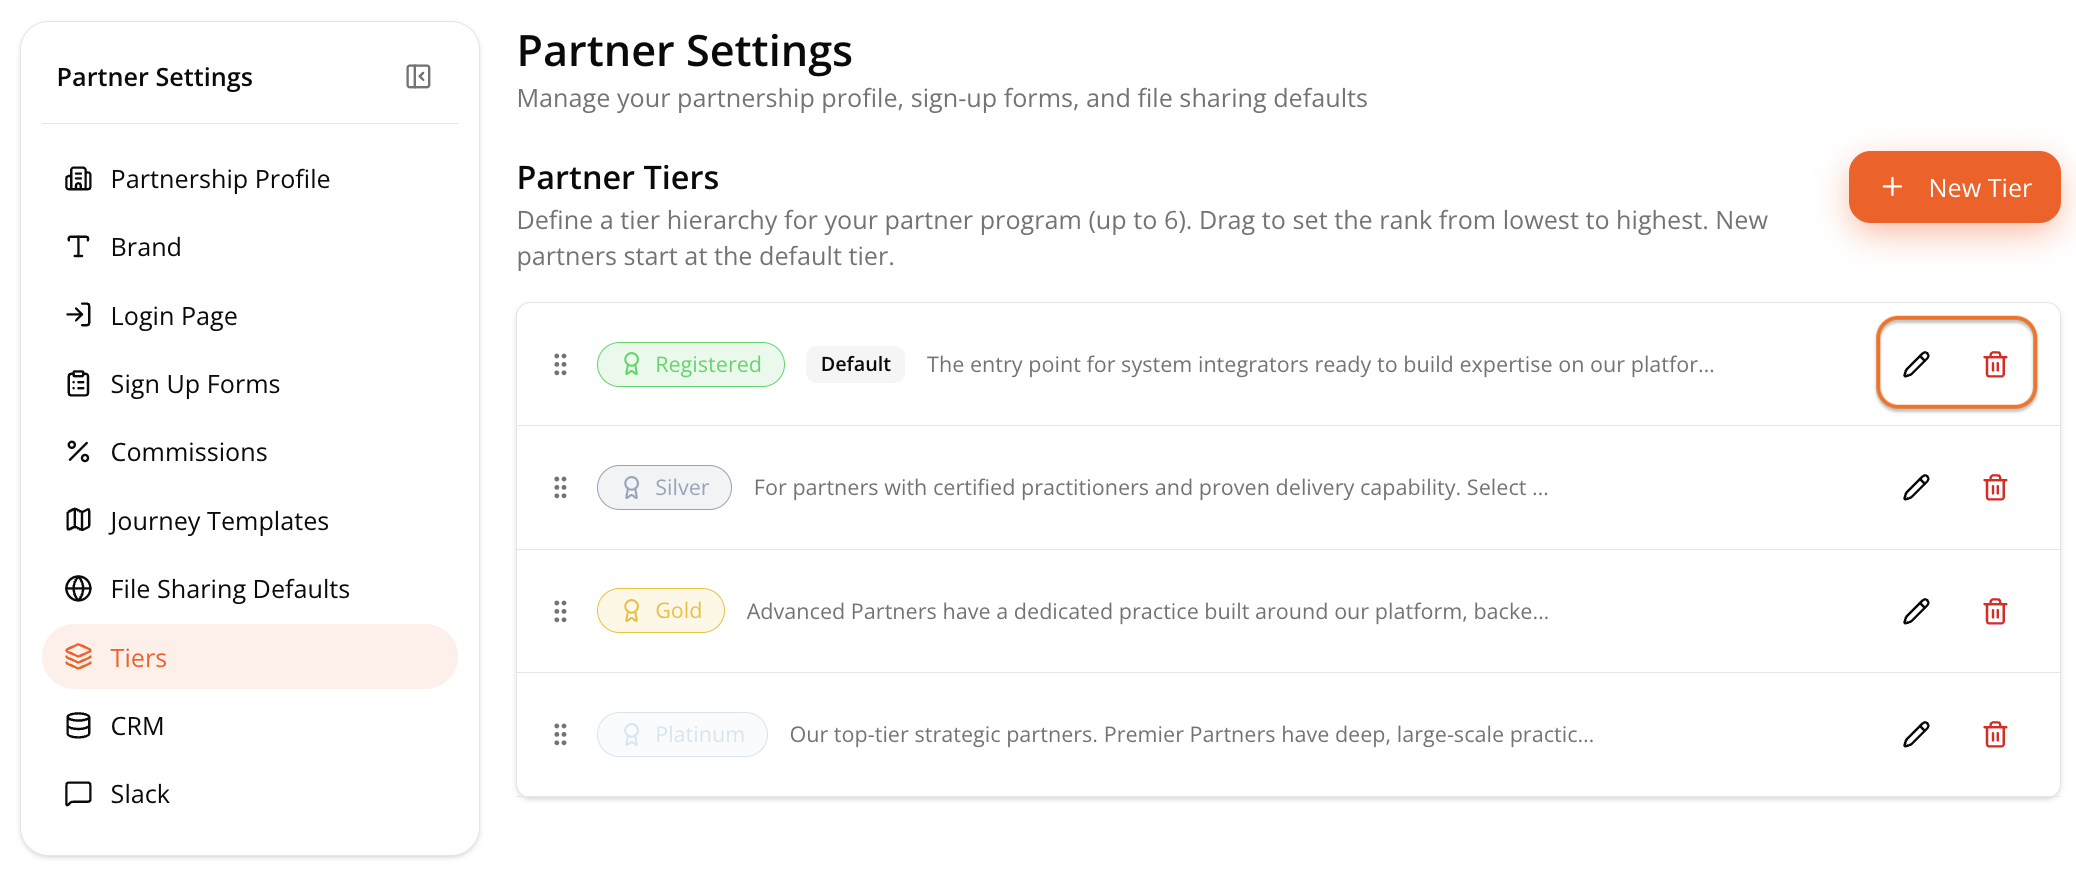
- Go to Fours Console, then Partners.
- Click Settings at the bottom of the rail, then Tiers.
- Click Edit (pencil icon) or Delete (trash icon) on the tier you want to change.
Assign a Tier to a Partner
Tiers aren’t just definitions — they need to be assigned to actual partners. To change a partner’s tier:
-
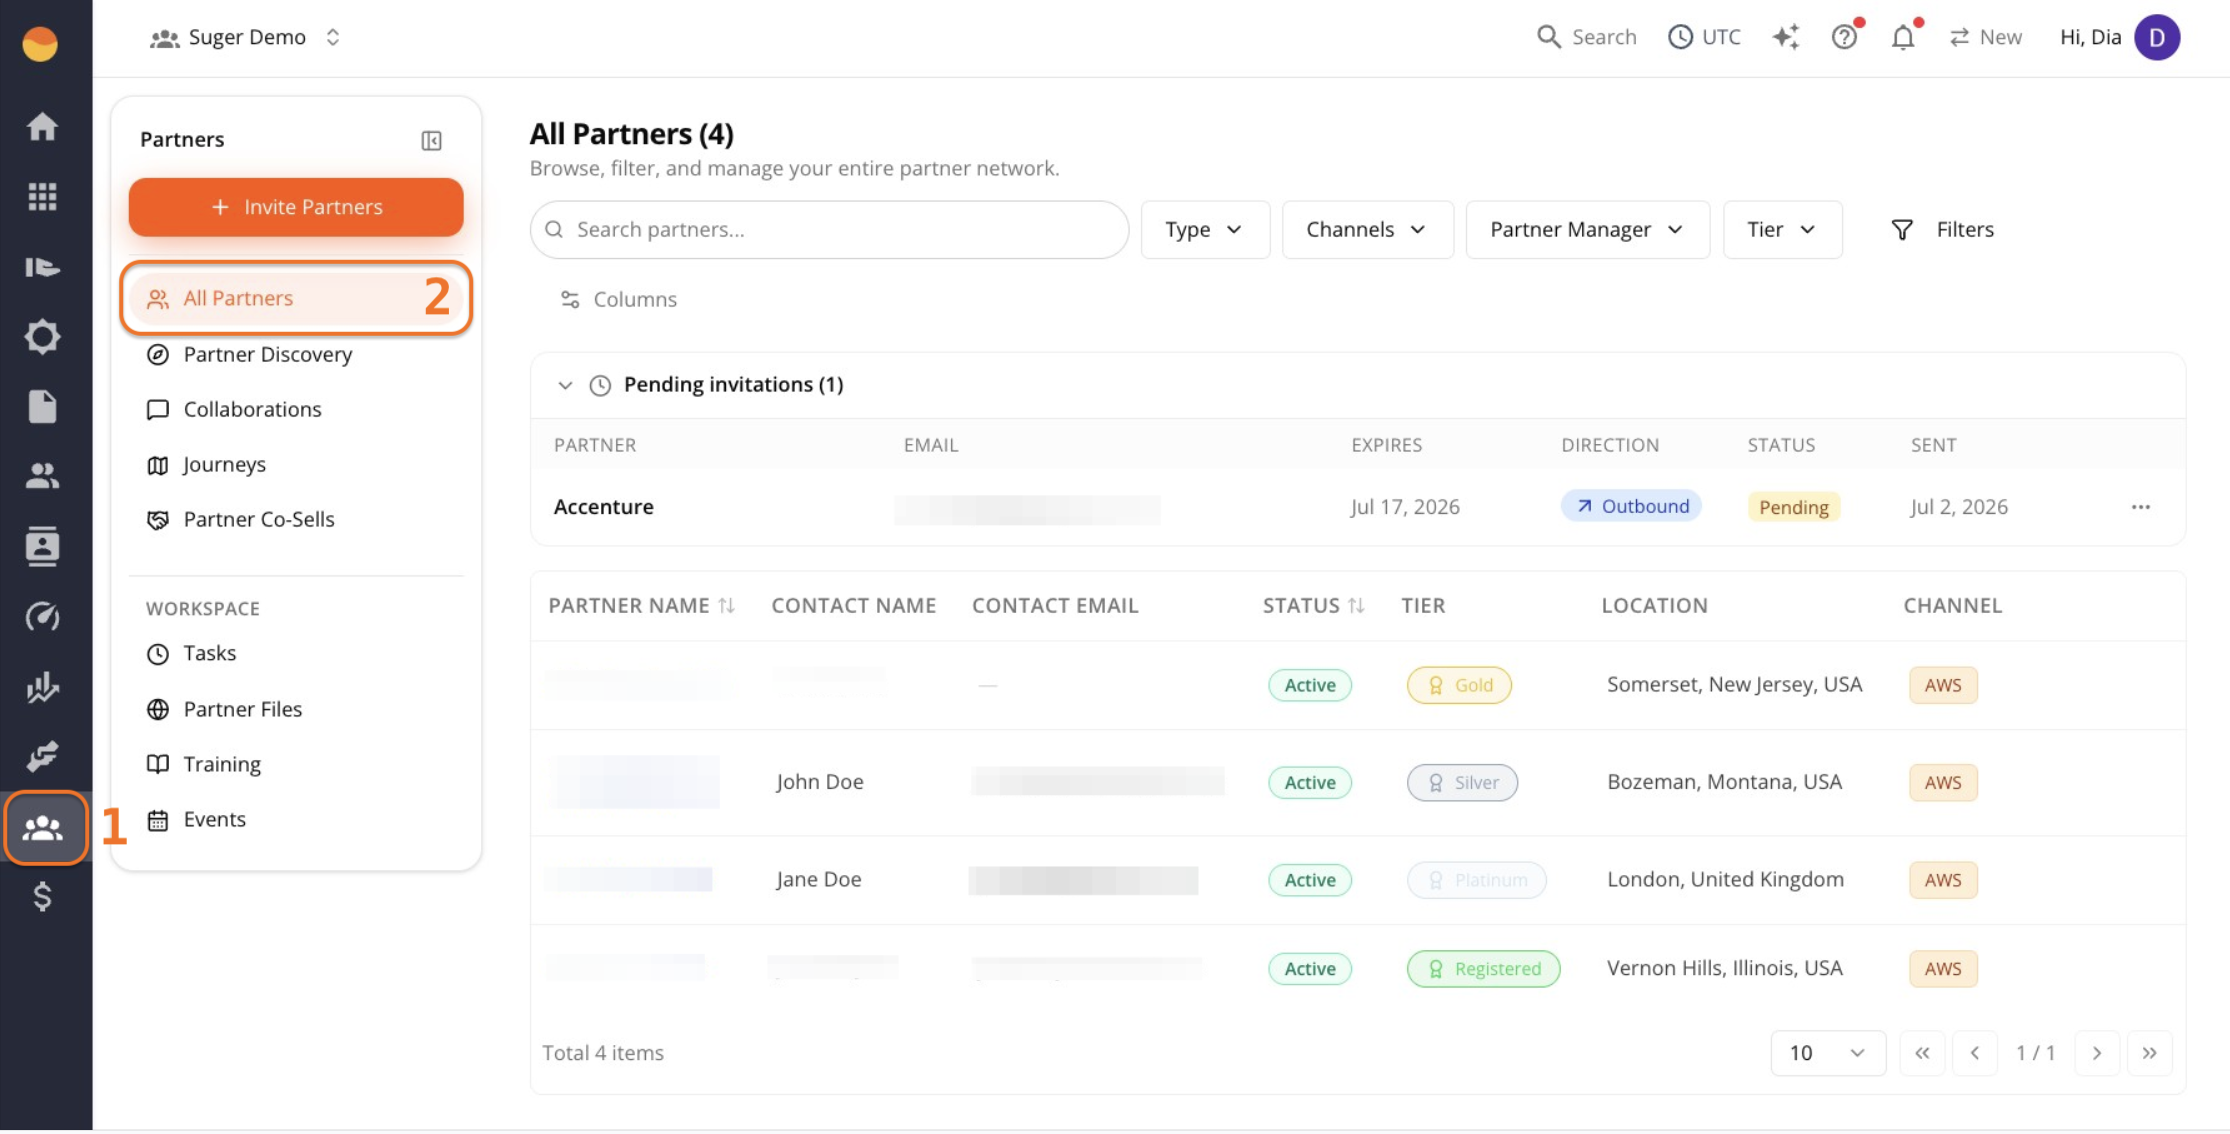
Go to Fours Console, then Partners.
-
Click the partner’s name from All Partners.
-
On their Overview page, find the Tier card in the right sidebar.
-
Use the dropdown under “Their tier in your program” to select a different tier.
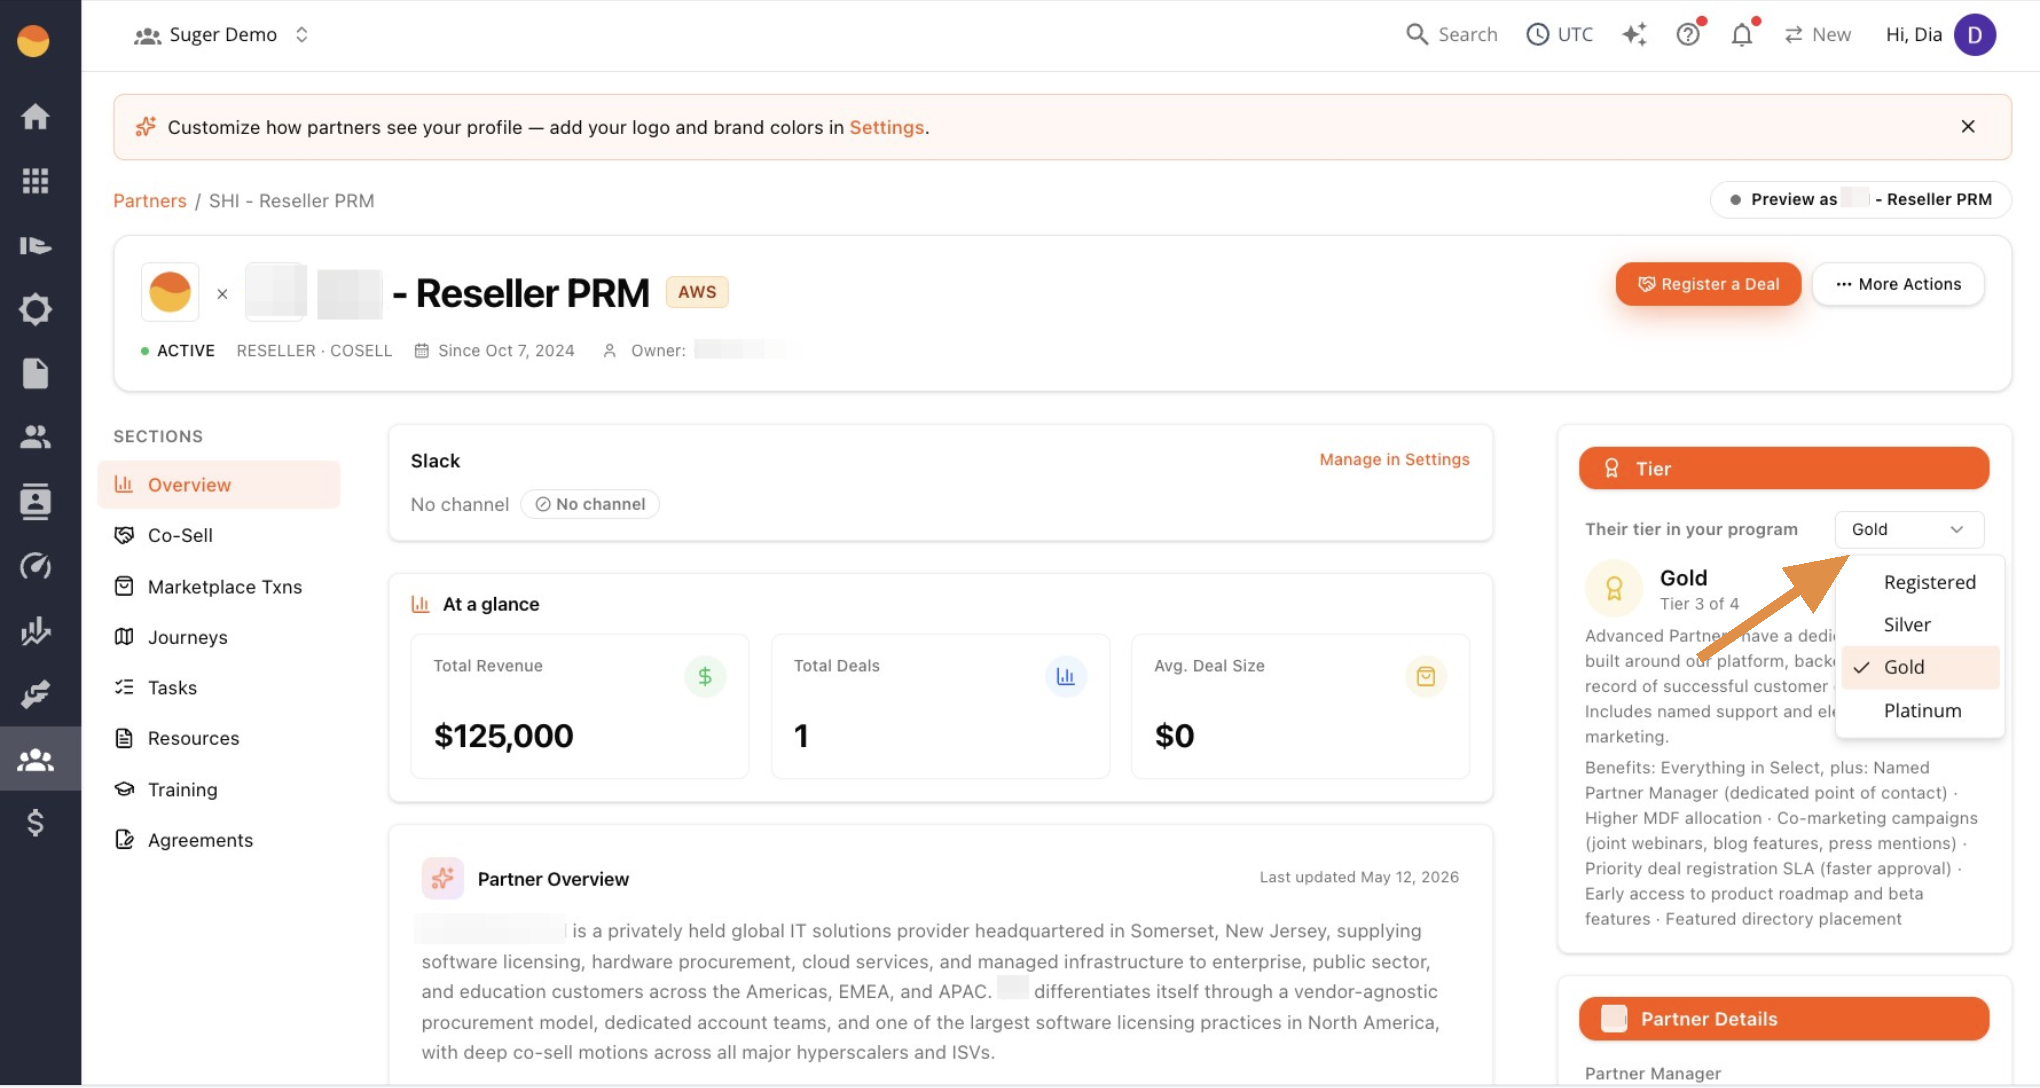
The card updates immediately to show that tier’s description and benefits, pulled directly from what you configured. A manual change is recorded on the partner’s Timeline as a change made by hand.
Earn Tiers Through Journeys
You don’t have to move every partner by hand. A partner can earn a tier by finishing a journey, and keep it by finishing it again each year:
- A journey with a tier outcome promotes. Give a journey template a Tier outcome, such as Promote to Gold, and a partner who finishes every required step moves up to that tier. Promotion only moves a partner up, and it can skip tiers; a partner already at or above that tier keeps theirs.
- A journey can start on its own. Start automatically for partners at assigns the journey to partners at a tier you pick, so a partner who reaches Silver starts the path to Gold without anyone assigning it.
- Its steps count the work. Deals, Marketing points and Earn certification steps that ask for a number of people complete themselves from your partners’ co-sells, approved marketing requests and certificates.
- Tiers can renew each fiscal year. With renewal on, each partner’s current tier journey restarts at the start of your fiscal year, and a partner who doesn’t finish it in time keeps their tier or moves down one tier, as you choose.
Fours applies these as things change: a partner’s tier journeys are checked again shortly after a co-sell, certificate or marketing request changes, and every night. Saving your tiers, your journey templates or the tier year settings applies them straight away. To set it up, see Create and Assign Partner Journeys and its Tier Year and Renewal settings; to follow it, see Track Journey Progress.
D2 render error:
[{"range":"index,12:11:692-12:16:697","errmsg":"index:13:12: edge with board keyword alone doesn't make sense"},{"range":"index,13:0:698-13:5:703","errmsg":"index:14:1: edge with board keyword alone doesn't make sense"}]
The partner record’s Tier card shows Since and the date the partner’s tier last changed, and Renew by and its deadline while their tier journey is renewing. The record’s Timeline lists each change with its reason, for example Tier: Silver → Gold · tier journey completed (Path to Gold), or renewal missed, or changed by hand. If you write tiers to Salesforce, a line under your tier list says so, Salesforce: On or Salesforce: Off, with Set up in CRM settings; see Write Partner Tiers to Salesforce.
Spotted something wrong or out of date on this page? Tell us and we'll correct it.