Install the Dynamics 365 App
Install the Dynamics 365 App in a Dynamics 365 Sales environment and connect it to your Fours organization. A Dynamics 365 System Administrator does this setup once for each environment. Users do nothing until they get a Fours security role.
Overview
When you complete this guide, these items are in place:
- The Fours for Dynamics 365 solution is installed in your Dynamics 365 Sales environment.
- The Fours application user in the environment has the Fours Integration role.
- The Fours org-level integration wrote its connection into the environment.
- Your users have Fours security roles and can open the Fours side pane on an opportunity.
Prerequisites
Before you start, get these items:
- A Dynamics 365 Sales environment, and a user with the System Administrator role in it.
- A Fours admin user, to manage integrations in the Fours Console.
- The Fours org-level Microsoft Dynamics 365 integration, with its application user in the environment. See Microsoft Dynamics 365. You can connect the integration before or after you install the app. Step 3 tells you what to do in each case.
- During the preview, the managed solution file that your Fours account team sends you.
Step 1: Install the solution
The app is a managed solution named Fours for Dynamics 365. The install path depends on where you get the solution.
During the preview: import the solution file
- Get the managed solution file from your Fours account team.
- Go to make.powerapps.com and sign in as a System Administrator.
- In the environment picker at the top of the page, select your Dynamics 365 Sales environment.
- In the left navigation, select Solutions.
- Select Import solution.
- Select Browse, select the managed solution file, and then select Next.
- Select Import.
- Wait for the import to complete. Fours for Dynamics 365 then shows in the list of solutions.
After the AppSource listing is live
- Open the Fours for Dynamics 365 listing on Microsoft AppSource.
- Select Get it now.
- Select your Dynamics 365 Sales environment, and follow the prompts to install the app.
Step 2: Set up the application user
The application user is the Dynamics 365 user that the Fours org-level integration acts as. It is not a person. When an admin connects the integration, Fours uses this user to write its connection into the Fours Configuration table. For that write, the application user needs the Fours Integration role.
- Go to the Power Platform admin center.
- Select your environment, and then select Settings.
- Select Users + permissions > Application users.
- If the Fours application user is not in the list, create it first. See Grant Security Roles via Power Platform Admin Center.
- Select the Fours application user, and then select Edit security roles.
- Select Fours Integration. Do not remove the roles that the application user already has.
- Select Save.
Step 3: Connect Dynamics 365 in the Fours Console
When an admin connects the org-level integration, Fours writes the connection for the app into your environment. Users never type or see it. The write needs the Fours for Dynamics 365 solution, so install the solution before you connect.
- In the Fours Console, go to Settings > Integrations > Microsoft Dynamics 365.
- Connect the org-level integration with your tenant ID and the URL of your environment. See Create Integration (Org-Level).
- If Dynamics 365 was connected before you installed the solution, disconnect the org-level integration and connect it again.
The earlier connection did not write anything into the environment, because the solution was not installed then. The new connection writes it.
Step 4: Assign Fours security roles
A user without a Fours security role cannot use the app. Give each user the role that matches their work:
- Assign Fours User to everyone who works with offers and co-sells.
- Assign Fours Admin to the people who manage the Fours configuration of your organization.
- If you turn on offer approval, also assign Fours Approver to the people who approve offers.
Keep the Sales roles of each user. The Fours roles for people grant no Dynamics 365 privileges of their own. For what each role allows and the steps to assign roles, see Security Roles.
Step 5: Open the pane
- In Dynamics 365 Sales, open an opportunity record.
- On the command bar, select Fours. The button is next to Save.
- Make sure that the Fours side pane opens and shows the tabs of the opportunity.

The status line at the top of the pane reads “Signed in with Dynamics as” and your name. Under it, the pane shows the co-sells, offers and agreements of the opportunity.
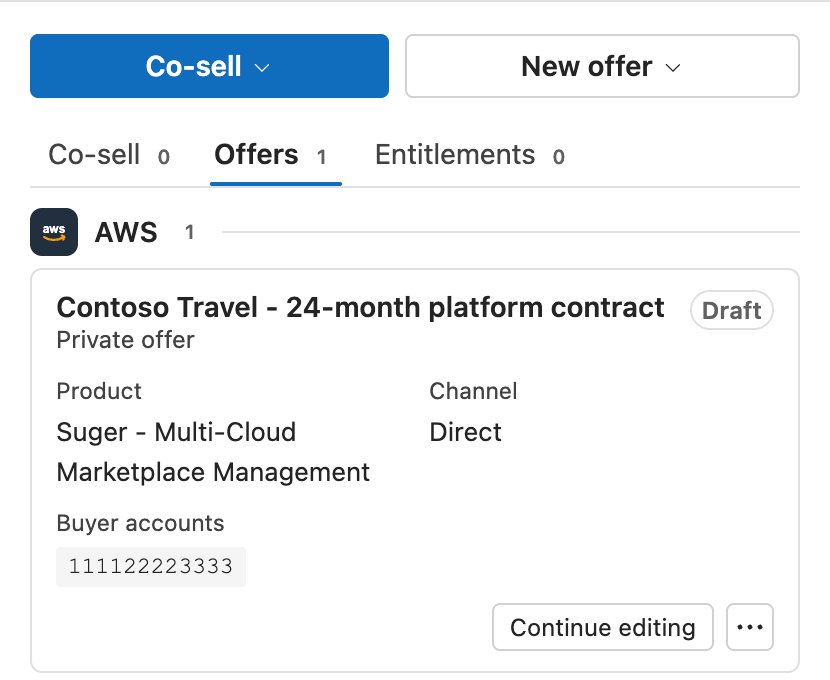
If the pane shows a message instead of the tabs, use this table:
| The pane shows | What to do |
|---|---|
| “You don’t have access to Fours” | Assign a Fours role to your user, as Step 4 describes. Then reload the page. |
| “Fours is not connected” | Do Step 3 again. If you connected Dynamics 365 before the install, disconnect and connect again. |
| “Open an opportunity to see its co-sells, offers and entitlements.” | Open an opportunity record. The pane works on opportunity records only. |
For more fixes, see FAQ and Troubleshooting.
Spotted something wrong or out of date on this page? Tell us and we'll correct it.